

Web stories are in high demand, and every blogger or content writer is switching to web stories now. Web stories are easy to create and manage, and this is the reason why many are creating stories and earning a lot.
Daily, there are thousands of stories getting created and published.
Also, if any of your stories gets viral, you can get traffic in millions and that can ultimately increase your earnings.
These days Google Web stories are in great demand, these are similar to Instagram and Facebook Stories.

But do you think creating web story is easy and simple?
Yes, it is simple but little time consuming.
However, there are many methods of creating web stories, if you follow the right procedure, you can create a web story in just 5-10 minutes.
There are many content writers who are using this procedure and process so that they can create stories in just 5 minutes. Now, they are creating more than 20 stories in a single day.
I have personally followed this process, and on an average, I took 10 minutes for each story, even though I am new to web stories.
Earlier I was taking more than 30 minutes to create and publish a single story.
Before you start creating your web stories, there are some prerequisites that you have to complete.
What are the prerequisties?
- Install the WordPress plugin (Google Web Stories or make stories), but I would recommend go for Google Web Stories.
- Activate the plugin.
- Ensure the publisher ID is updated in the monetization part of Web story. You can get Publisher ID from Google Adsense.
- Upload the logo in your story. There are many websites and applications through which you can get free logos.
- Be ready with the niche in which you will be creating the webstory. A niche can be finance, sports, entertainment, News, education, etc.
Once you are done with all the prerequisites, we are now ready to create and publish stories.
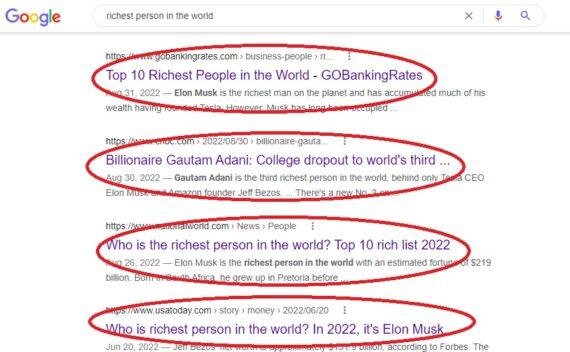
Let us take an example you are creating a story on News and top stories niche, and you have finalized the topic.
The topic which you have finalized is “The richest person in the world”.
6 Step Formula
Step 1 – Gather all information about the topic.
Do detailed research on your topic, and search in Google search engine and Bing search engine. Collect as much data as you can. Open a notepad or a word file and add all the collected data, add only major bullet points. Ensure you have at least 12-15 bullet points.

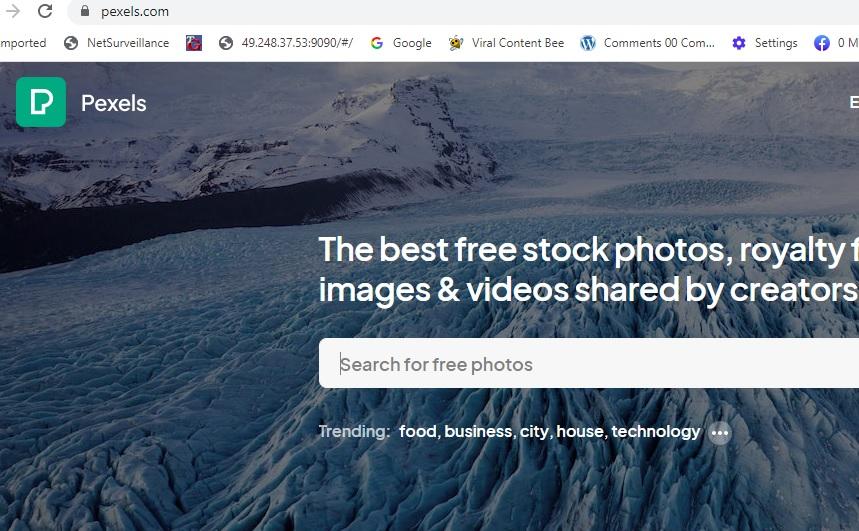
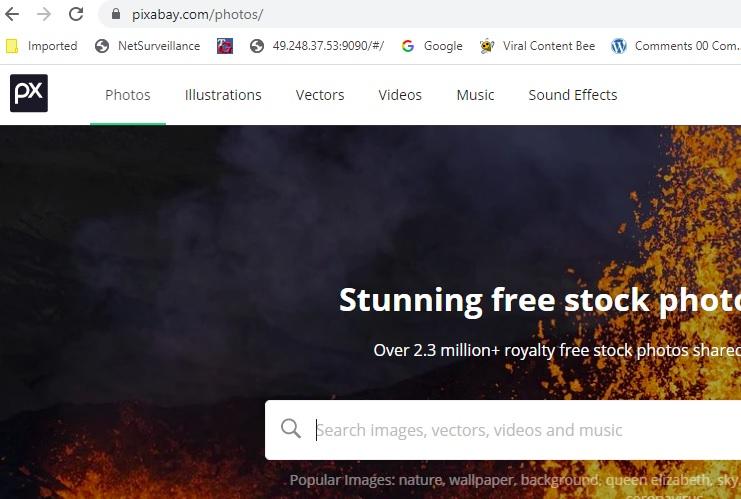
Step 2- Gather all images related to data.
In a web story, the most important part is the images as the content is very less. Make use of Pexels or Pixabay to look out for content-related images, these sites are free to download good quality images.
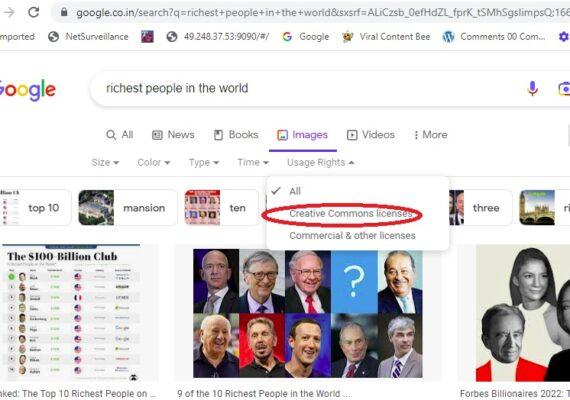
If you are not getting the exact image, go for the google image search option, do not forget to change the search image settings to “Creative commons license“.
If here also you are not able to find the right image, search the image in pinterest or facebook groups. These two are also a source of thousands of images.
The most important part of these images is – all should be high-definition images with good resolution. One can also add GIF images if you are not getting the correct still images.
Step 3 – Add an attractive heading.
The heading of your story should be attractive, interactive and catchy, it should generate curiosity when someone sees such headings.
Take help from Google keyword planner or any keyword tool. The keyword difficulty should be low, a low difficulty keyword is easy to rank whereas it is tough to rank a keyword having high difficulty.
Click here to find the difficulty of a keyword for free. Normally you will not find any free tool where you can check the difficulty level, but this is a 100% free tool.
Step4 – Start adding images.
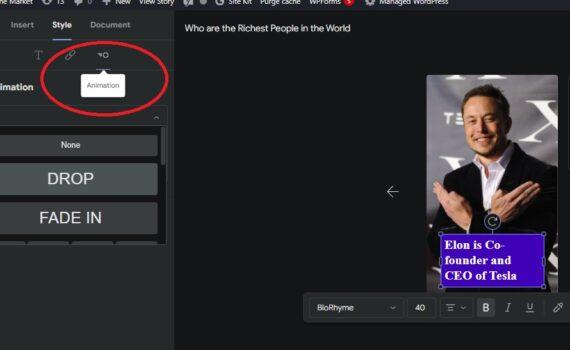
Since you now have a collection of images, upload at least 10 -15 images, and write few lines on these images with bold letters and large fonts. Refer to the below image as an example.
The wording should be relevant to the image. Don’t write too much, just few words.
With this your web story is almost 90% completed, there are now few settings which you need to work on.


Step5 – Review and final touch-up.
This is the final and the most important step. You should review your entire web story before you actually publish it.
You need to go to insert option and then enter link in the call to action bar. You can add link of your blog or link of any other stories. This is to generate more traffic on you blogs and other stories. If your web story has 10 pages, you can add link onto two of your pages. If your story is of 15 pages, you can add link onto 2-3 pages of your story.
Ensure you add the animation on each and every page where you have written something, this will make your Google Web story more interactive and attractive.
Before publishing the web story, do not forget to add the poster image.
Add relevant categories and relevant tags, just like you do it for a new blog.
That’s it you are done; you can now publish your Google Web Story.
Step6 – Advertise and rank your website.
The task is still incomplete even after publishing the story! Unless and until the story is added in the Google Search Console, it will not get indexed. Once the indexing part is completed, you can now promote and advertise your stories on social media platforms like Twitter, Facebook, Instagram, Reddit and Linkedin.
Conclusion
Creating and publishing Google web stories in 10 minutes or 5 minutes is possible, provided you follow the 6-step formula, which I have disclosed just now.
Your actual earning will only start once you have published at least 50 Web stories.
To learn and earn more online earning and passive income, do check out my blogs and websites.